
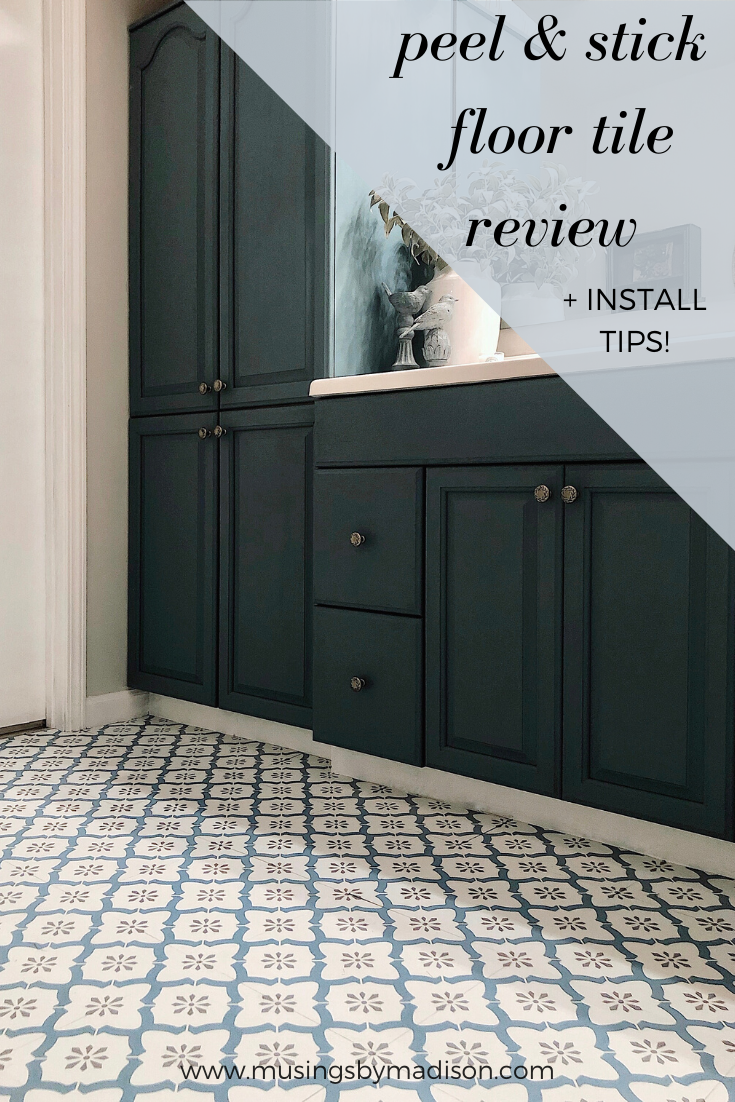
FLOORPOPS PEEL & STICK VINYL FLOOR TILES
Looking for a quick and inexpensive way to update your old flooring? Well, you’ve come to the right place! I’ve partnered with WallPops to completely transform our guest bathroom using FloorPops peel and stick vinyl floor tiles. WallPops is my go-to for easy, affordable home improvements – offering stylish peel and stick wallpaper, peel and stick floor tiles, wall tiles, and more.
I know what you might be thinking… peel and stick flooring? WHAT?! Stay with me because I’m sharing everything you need to know about them! Keep reading for my full review on FloorPops peel & stick vinyl floor tiles by WallPops, how to install them, pros and cons, and more frequently asked questions!
AN EASY AND AFFORDABLE WAY TO UPDATE OLD FLOORS
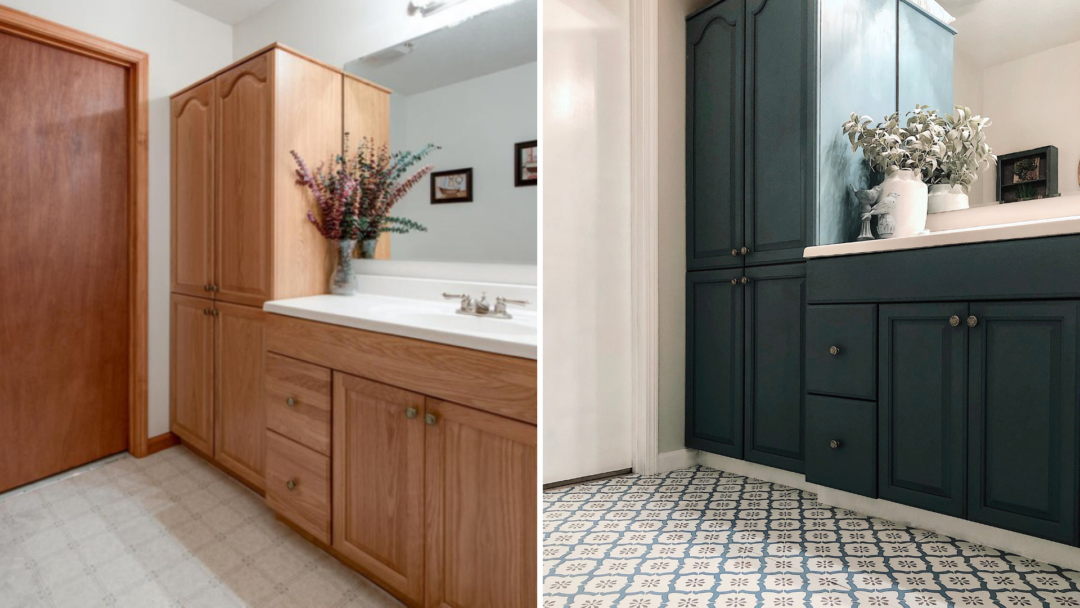
Justin and I have been making improvements to our home since the day we moved in! It’s been so fun to work together to make our house feel like home. But one thing on my list was to update the old, outdated linoleum flooring in our basement bathroom. (See the before picture on the left above). Since this isn’t going to be our forever home, I knew I didn’t want to spend a ton of money to update the old flooring. So using FloorPops peel and stick vinyl floor tiles from WallPops was an obvious choice to give this bathroom the update it so desperately needed.
This easy bathroom flooring update cost us less than $100! And for the amount of time and money we actually spent, it made a HUGE impact.
So, here's what I'll cover in this post:
- How to install peel & stick floor tiles
- What you’ll need
- The pros and cons of peel & stick
- Frequently asked questions
- My final thoughts & review
getting started with PEEL & STICK VINYL floor tiles
To get started, I measured the length and width of the bathroom floors and used the calculator on the WallPops website to determine how many boxes of tile I would need.
Important: When purchasing materials for home improvements, you should always account for waste. So, initially ordering a little more than you need is smart. And it’s best to order it all at once instead of later to ensure you’ll receive the same dye-lot with the tiles.
The minute I received the Alfama FloorPops peel and stick vinyl floor tiles, I wanted to install them immediately because I was so excited! But… you can’t.
As with most flooring, you MUST allow 48 hours for the floor tiles to acclimate to the room temperature of your space before installing. (Patience really is a virtue.)
But, while the tiles acclimated, I gathered my tools and started on some prep-work for installing the peel and stick tile. There will be no wasted time here, folks.
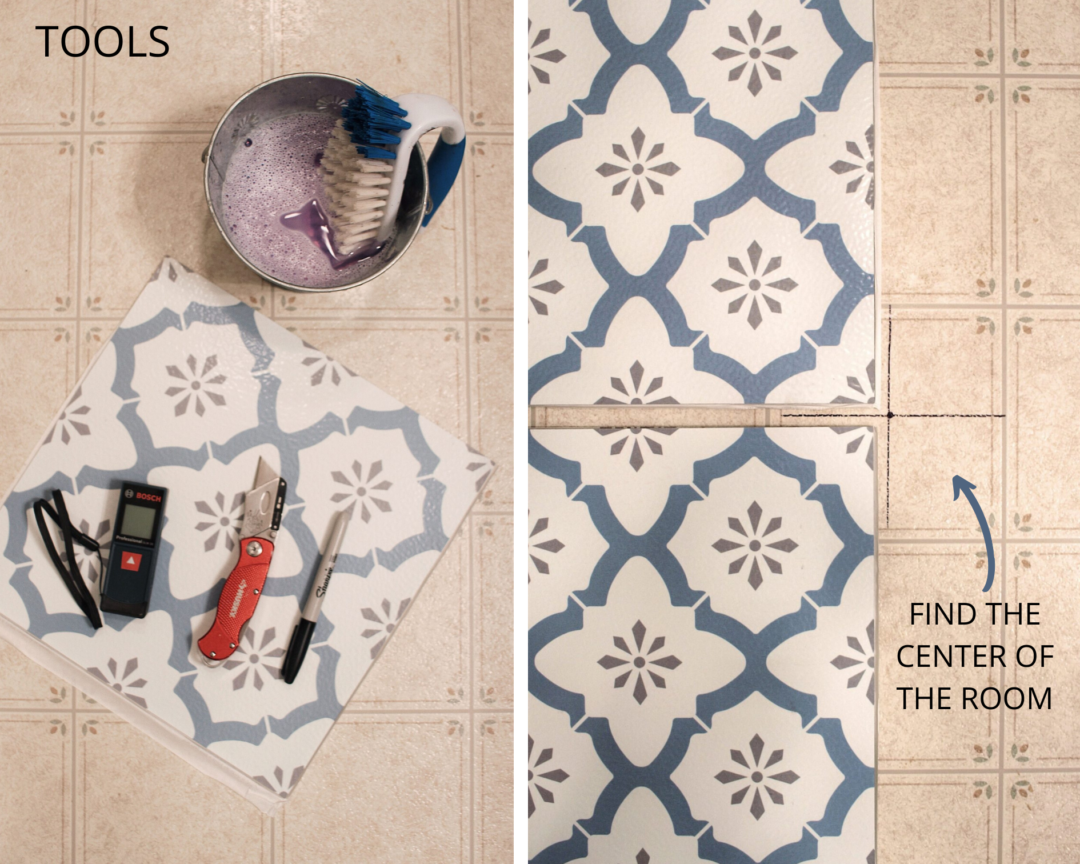
What You Need
-
Floor cleaner and broom to prepare the surface
*Area must be free of oils, grease, dirt, etc. for the tiles to adhere properly -
Measuring tape/laser and ruler
*Anything to measure the space with and also draw straight lines! -
Permanent marker
*Anything to mark visible lines with -
Utility knife
*Works best for skinny/odd corners, etc. -
Scissors
*Worked best for most of my cuts. But be sure to use scissors you don't care to ruin. The adhesive will definitely get all over them! -
Garbage bag
*As you pull the backing off each tile and make cuts, the trash can pile up quick!
preparing to install peel & stick Flooring
First, I cleaned the floors really well and let them dry. Clean, dirt-free floors are essential for the tiles to stick properly!
Then I used my laser to measure and find the center of the room and drew a big X with a permanent marker. (The X will be your starting point and I would draw it as big as the tile is, not the pic shown above. I went back to make it bigger after the photo!)
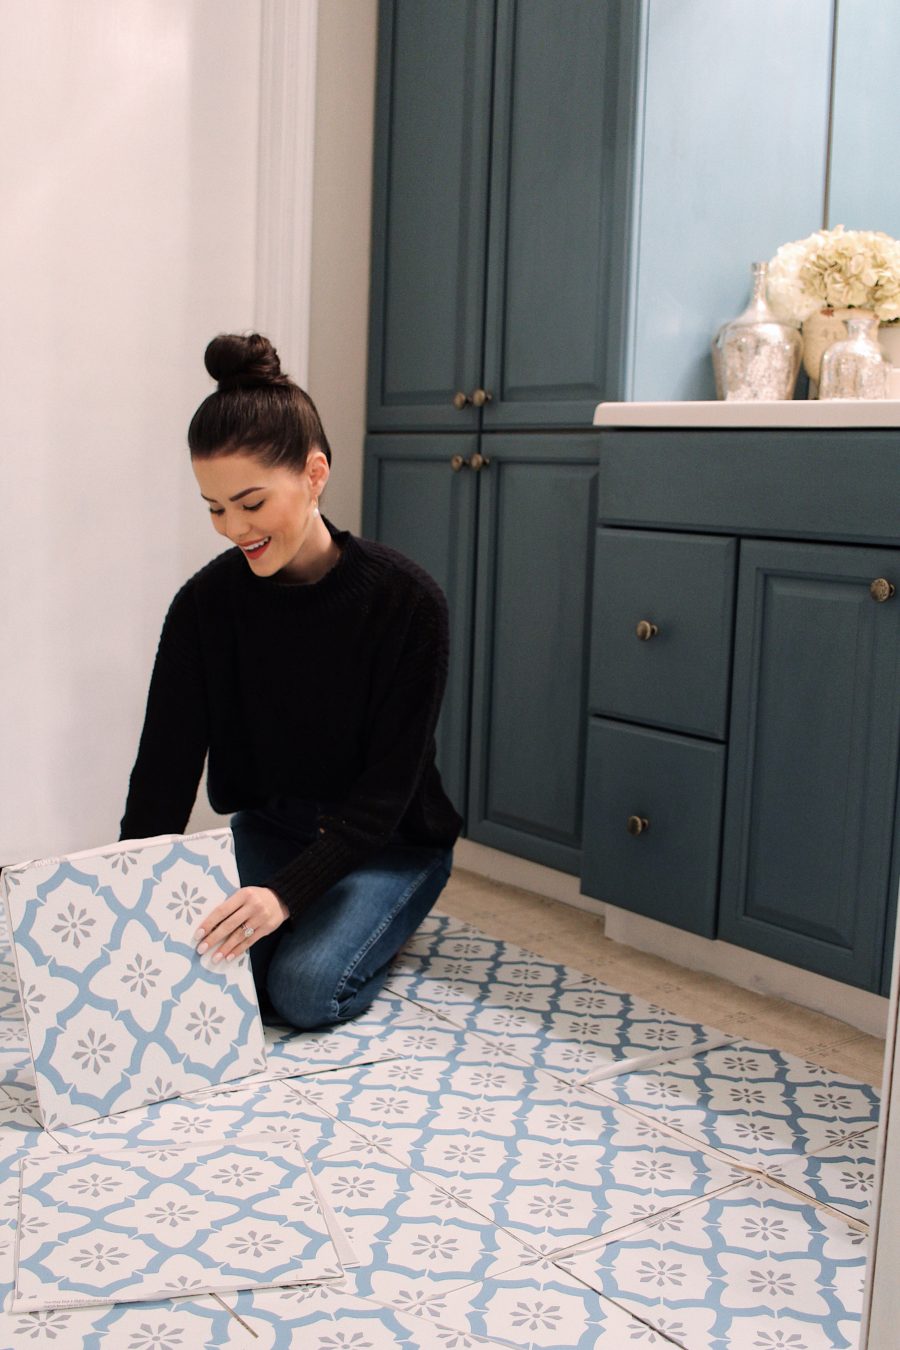
After that, I started laying the tiles out to make sure the patterns would line up as close as possible. Plus, this allows you to shift tiles as needed to avoid cutting thin pieces. This part was kind of fun for me – it was like a giant puzzle!
You will find that there is a variation in the pattern and some of the pieces won’t align perfectly. So as needed, I swapped out tiles and rotated them for the best fit/match.
Finally, after waiting 48 hours, I was ready to begin installing my peel and stick vinyl floor tiles!
HOW TO INSTALL PEEL & STICK FLOORING - step by step
- Let tiles acclimate for 48 hours
- Thoroughly clean the area and prepare the surface
- Find the center of the room and lay out the tiles (with the backing on first). Make adjustments, rotate tiles for the best pattern match, and shift as needed to avoid trimming as many tiles as possible.
- Carefully remove the backing and apply tiles to floor. Press firmly into place.
- Start in the center of the room and work in a stair-step pattern out from there
- Sweep away any dirt or debris from the area before applying each tile
- Peel backing off slowly and avoid contact with your hands as much as possible (touching the glue can compromise the stickiness)
- Mark and cut any edges BEFORE removing the backing
After you’ve laid all of the tiles, if any corners seem to be lifting, apply something heavy over it for a day or so to press the corners into place.
For more tips and detailed directions on how to clean or install FloorPops peel & stick vinyl tile, visit this page from WallPops.
THE PROS AND CONS OF PEEL & STICK VINYL FLOORING
If you have doubts about whether or not peel & stick vinyl flooring is right for you and your project… You’re not alone! Below I’m sharing my honest opinion about the pros and cons of using peel and stick flooring.
The Pros
- Easy to install: With normal tiling projects, you’d need power tools and a whole lot of work. But with peel and stick vinyl tiles, the entire process was very easy.
- Affordable: For just $90, I was able to completely transform our bathroom. Whereas, if we went with ceramic or porcelain, we’d have to by grout, mortar, spacers, pay for labor, etc. It would’ve cost hundreds, if not thousands, to completely renovate our bathroom!
- Quick: The project only took me about 4-5 hours total. From cleaning the bathroom, laying them out, making cuts and installing them.
- Modern designs: Unlike a lot of other inexpensive flooring options, FloorPops peel and stick vinyl tiles are available in many different updated and modern designs.
- Semi-permanent: I love the peel and stick flooring I picked out, but whoever buys our home next might not. FloorPops have a strong adhesive backing, so they aren’t removable in the sense that they will peel right up. They can, however, be removed with a little elbow-grease should you choose to.
- Durable: FloorPops peel and stick floor tiles are water-resistant and the vinyl material makes them super durable. I was concerned that using peel and stick flooring could cause more.
The Cons
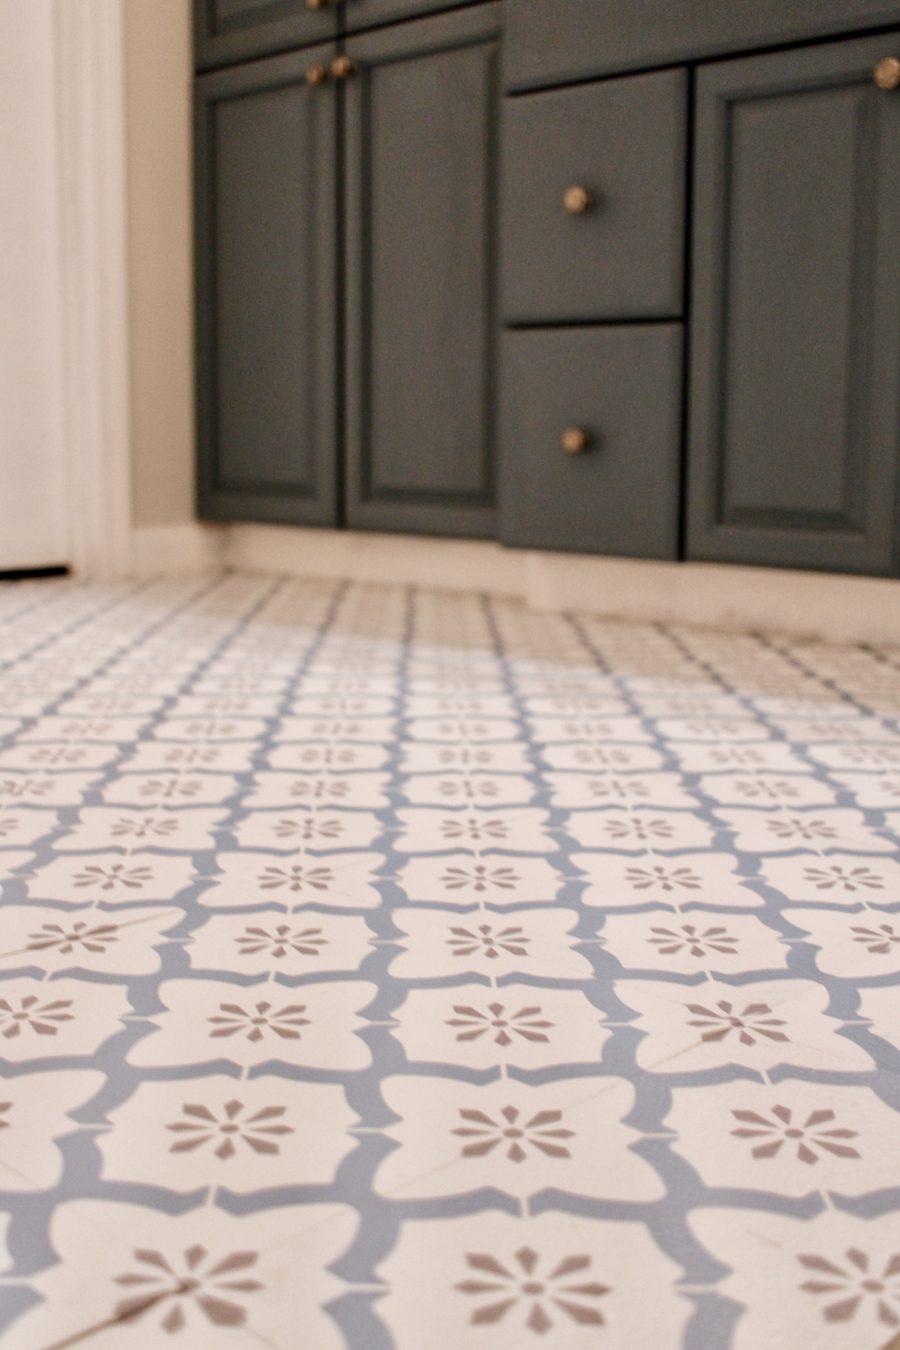
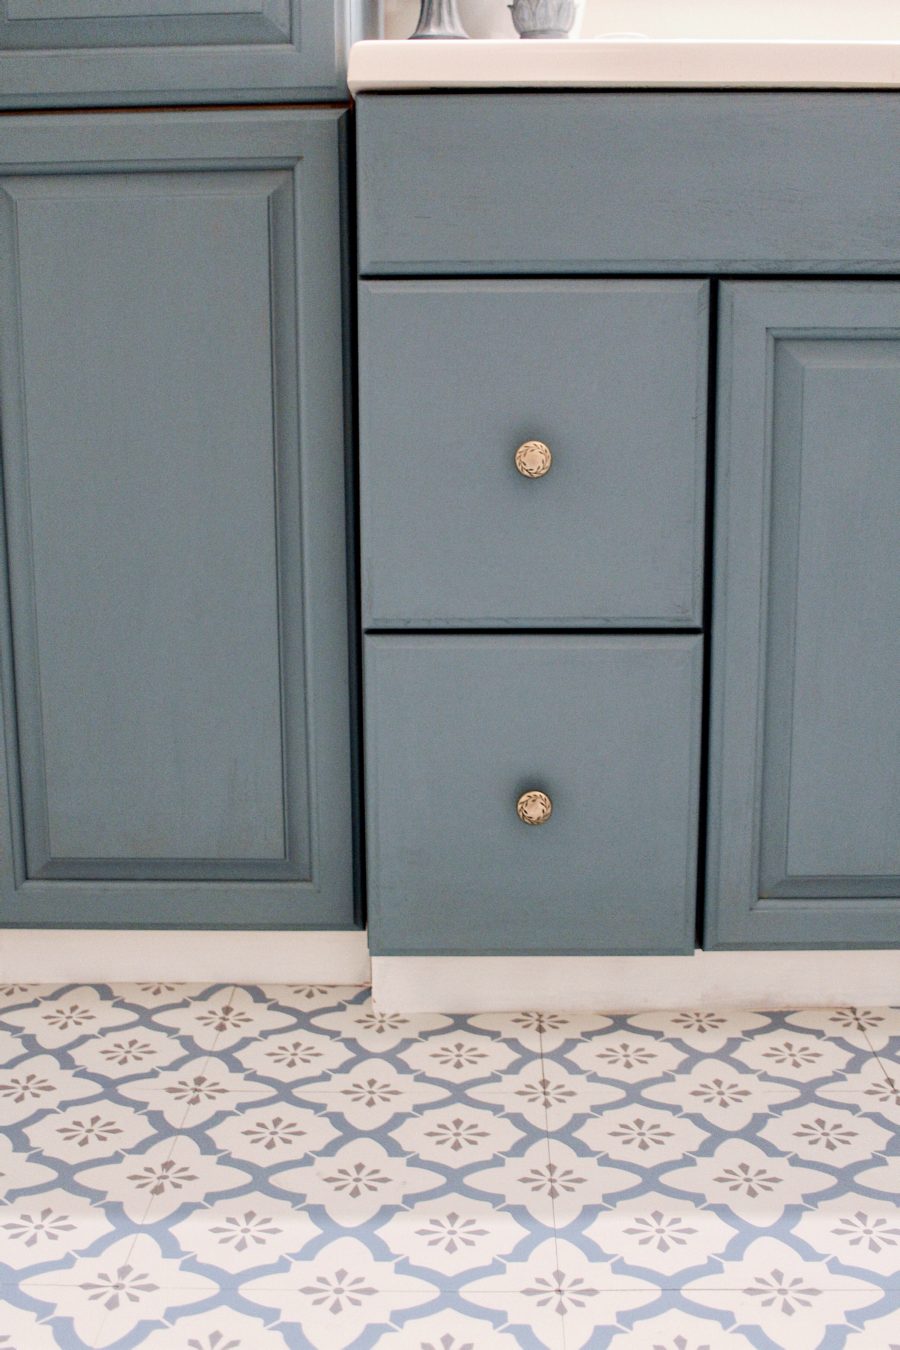
- Pattern variation: If you look closely you can see the seams between the tiles and areas where the pattern doesn’t match up perfectly. When first laying out the tiles, I made sure the pattern in main areas of the bathroom were a close match. But in some places, there just wasn’t a way to get them to line up perfectly. I am a little OCD, BUT it doesn’t bother me since it’s such an improvement over the previous flooring and this isn’t our master bathroom.
- Stickiness: The adhesive on the back of the tiles is VERY sticky. So, it can be tricky to work with. Likewise, there were a couple corners on some tiles that didn’t seem to stick that well the floor. I put something heavy over those areas to allow the adhesive to take. Worst case, I’ll just super glue them down. No going back then. 😉
WHAT TO KNOW ABOUT PEEL & STICK VINYL FLOOR TILES + FREQUENTLY ASKED QUESTIONS
When I first posted about the FloorPops peel and stick floor tiles from WallPops, I got a flood of questions! So I’m answering a few here and linking to their FAQ page so you can check it out. But, of course, feel free to do your own research and review their site for more information.
1. Are they rental friendly? Easy to remove?
Yes and yes! But I’d probably install with caution. Like in an area with low-to-medium traffic that won’t get super wet. The peel and stick vinyl tiles are semi-permanent. Meaning, they aren’t removable in the sense that they will lift right up. But, they can be removed using a scraper to wiggle under a seam and pop a corner of the tile up. From there you should be able to pull the tile up with your hands. The adhesive is strong though – so, it is possible that some adhesive residue may be left behind when FloorPops are removed.
2. Does it look obvious that they’re peel and stick floor tiles?
Nope! Honestly, it looks like tile but feels like vinyl.
3. What’s the durability of FloorPops peel and stick vinyl floor tiles?
FloorPops are water resistant and 5 days after installation you can sweep, mop, vacuum or dust away! For best results, they recommend to use a vinyl floor cleaner and not to clean with an excessive amount of water. I think if installed in a lower-traffic area and maintained properly, they will last a long time! Vinyl is a durable material, but like with any flooring, it can be subject to indentation and wear.
Those were the most asked questions I received regarding the FloorPops peel and stick vinyl floor tiles. If you still have questions, feel free to visit WallPops FAQ page and website for more information!
FLOORPOPS PEEL & STICK VINYL FLOOR TILES REVIEW & TIPS
FINAL THOUGHTS
In just a few short hours, I was able to transform this small space with a fresh new look using WallPops vinyl peel and stick floor tiles. I’m so happy with how it turned out and to not see that outdated linoleum floor anymore!
As for durability and how they will hold up, time will tell. But so far so good! And the other reviews I’ve read have all had good things to say! I’m just so excited to cross another DIY/home improvement project off of my list.
I hope you all enjoyed my review and tips for installing peel and stick flooring! If you have any questions I didn’t answer, feel free to shoot me a DM on instagram or drop a comment below. Thanks so much for reading!
FLOORPOPS PEEL & STICK VINYL FLOOR TILES
So, will you be updating your flooring soon? And will you be using FloorPops peel and stick vinyl floor tiles by WallPops? If you enjoyed this post about an easy DIY bathroom update, check out more home + decor content here.
Musings by Madison is a lifestyle blog written by Madison Clevenstine. Dedicated to classic style, beauty, home decor, and travel. Rooted in passion for inspiring and encouraging others to create a home, life, + closet they love. For more content, visit my shop page or connect with me on social!


About Madison
I'm Madison - a northern gal planting roots down south. Musings by Madison is your guide to classic style, beauty, home decor & more. Rooted in passion for encouraging others to curate a closet, home, and life they’re proud of and inspired by each day.
Learn more...